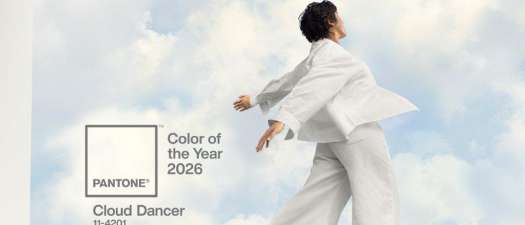
| |
 |
 |
 |
 |
 |
 |
 |
 |
 |
|
 |
 |
 |
|
|
 |
 |
|
All articles written by Beach Painting President, Jim Ashe, and published in the
The North Beach Sun. Please click on a title below to read the complete article.
Five things your painter
won't tell you!
Do Business with a Professional!
Fall Maintenance - Timing is Everything
Get Ready, Here it Comes!
Paint, Stain, Alkyd, and Acrylic? Help!
Industry Standards - For Your Protection
The Pleasures and Pitfalls of Deck Sealing
Power Washing
Cost Effective Tips
Before You Begin...
Paneling... To Paint or Not To Paint?
To Spray or Not to Spray?
Curb Appeal (and How Not to Get Burned)!
Color
The Truth About Lifetime Coatings
Never Paint Again?
|
 |
Do Business with a Professional!
Know how frustrating is it when you get lousy service at a restaurant or bank, or when you order this, but get that? Just imagine that kind of frustration only amplified, during (or even worse, at the end of) a home remodeling or new construction project. If you do your home-work up front and do business with a professional, you wont have to realize the truth to the old adage, you get what you pay for.
In the service industry, whether you are considering a painting job or a construction project, the consumer is counting on the laws and standards in their state to protect them from unsavory contractors. In North Carolina, many subcontractors such as painters, carpenters and roofers do not have to be licensed, and subsequently do not have to meet any minimum standards other than the uniform building code. Professionalism within the trades often suffers as a result.
At a restaurant you can complain or just not go back if you are left unsatisfied; with a construction project however, there is much more at stake. When you order a hamburger, you expect variations on the theme. When you are building or remodeling, you expect that certain standards will be in place. So dont shop price without knowing if you are comparing apples to apples first.
While building a house recently, the first thing I wanted to know when hiring a framer was How good is their service? Could they handle the job within my time frame? What good is a low price, if in the end I am unsatisfied with the job? Very often, consumers enter into a contract that seems complete, but falls short of the mark when the contractor is finished. Every detail of a job should be outlined in a proposal with a list of procedures, materials to be used, start dates, finish dates, payment schedules, ect. Only then can you begin to compare one proposal to another.
In my last article we discussed lifetime warranties, prices, and procedures relating to an exciting exterior painting product called Liquid Ceramic coatings. This product offers a lifetime, transferable warranty on labor and materials, while providing a 30% energy savings guarantee because of its insulation properties. While this product may be the best thing since sliced bread, even this will fail if applied improperly. Painting contractors in particular may best illustrate how wide the gap between professionals and the unprofessional can be. Anyone can paint; the act of applying paint to a surface can be achieved by nearly everyone. However, doing this for clients is quiet another process. I cant tell you how many times during an employment interview I have encountered painters who have actually only painted a room in their home. Many of these people are currently contracting work on a job just like yours. Are you scared yet? You should be. Each year I see more and more exterior jobs that fail within one year because a seemingly small corner was cut to save a few dollars. Many of these jobs cost in excess of ten thousands dollars. Imagine paying a painting contractor ten or twelve thousands dollars for an exterior paint job and then having to repaint only one year later!
In the past, the trades enacted apprenticeship programs to train their employees. This gave employees the guidance and experience that everyone needs to learn their trade, taking years to complete before making it to the top of their profession. In recent years this approach has faded, causing the standards of quality to steadily drop. Old world craftsmanship is slowly disappearing, falling victim to the ever quickening pace of todays life.
I firmly believe that an informed consumer is most likely to hire a professional for any type of project. Do yourself a favor and do your homework before hiring contractors. Each month the Better Business Bureau reports to the public a list of unresolved consumer complaints, and the vast majority of complaints is not about bad meals or used cars, but relate to building and home repair services. The BBB is a great place to start when checking a contractors references. Next, ask for references from past customers and a list of projects similar to your own. You dont want your contractor to be learning a new process on your dime.
Look very carefully at the scope of work outlined by the contractor to see if it is complete. Grey areas most often end in unpleasant surprises later, so leave nothing to chance.
Make sure that your property will be protected, and that the contractor carries all the necessary insurances to ensure this in case of mishaps, because even the best contractors have accidents from time to time. The way in which problems are handled is what separates the good from the bad in many instances, but you most often dont get to find out about this until after the fact. References will help you make your determination here.
Check to se that the quality of the material to be used is similar among the proposals you have received from different contractors, so you can be certain you are comparing apples to apples. Materials are only a fraction of the total cost of any project, so it is most cost efficient in the long run to use quality materials. Bargain materials fall short of expectations and can make for a very disappointing finished project.
Labor is usually the most expensive part of any project, so it is very important for you to determine the quality of a contractors labor force. Professionalism is easy to spot, either you have it, or you dont. If a contractor doesnt care much about the appearance of their employees, their vehicles, and their own property, how much is he/she going to care about your property? If a contractor cannot properly articulate a proposal, how are they going to manage your job?
Make sure that there are clear start and finish dates. Your job should be done in a timely manner. Make sure that you check to see if the contractor pays all necessary taxes so that they will be around to honor any warranty offered. The best warranty available is only as good as the company offering it.
The benefits of hiring a professional should not be over looked; your peace of mind depends on it. Do your homework first, so that you dont have to go through the aggravation of hiring someone new to finish a job that you have already paid someone else to do. Treat yourself well and hire someone who cares about your project as much as you do.
Back to top
|
 |
Fall Maintenance - Timing is Everything
Well, here we are again at the change of another season, and how welcome it is! For me, fall is a time of reflection and thanksgiving, and as Christmas draws near a time for family and friends.
On the Outer Banks, fall is typically a time anticipated by anglers worldwide. For homeowners however, fall is the time to plan your improvements and execute your maintenance program in preparation for the upcoming summer rental season. What? You dont have a maintenance program!
As you may already know, the Outer Banks is an area that may try your patience when it comes to getting required maintenance work done (or any other work for that matter). There seems to be a relaxed work ethic by the standards of many, which translates into unreturned phone calls and eventually frustration on the part of anyone wanting a certain task performed.
This area also has definite cycles in the way construction and maintenance is performed, all of which revolves around the upcoming rental season. Consequently, if you intend to wait until March or April to get estimates on the exterior or repaint that you need to have done it may be too late to have a professional job performed! I mention professional only because this area is saturated with unprofessional painters. You may want to review some previous articles for the gaggle of reasons not to use these folks!
Consider using a painting company that offers a maintenance program. Dealing with fewer contractors leaves less room for errors and should provide you with more personalized service.
Cost effectiveness is always the goal with planning and with any representative that you choose to manage your property. Youll be surprised how versatile a professional painting contractor can be in the scope of services they may offer! This can be a welcome addition to the services offered by your rental company and in most cases provide you with a much more complete and professional interior and exterior maintenance package.
With any job there is a logical starting point, and with yearly maintenance, exterior cleaning and power washing will provide great bang for your buck. For instance, you should find that it may be difficult to know what even needs to be painted until some of the ocean gook, mildew, and spider webs have been cleaned from the siding, trim and soffits.
Once these have been cleaned, you can begin prioritizing what needs to be done in order of importance, in accordance with your budget. Often, cleaning is all that is needed to make the outside of your property look fresh and suitable for guests, but certainly this process makes other problems readily evident.
While cleaning the house your professional may notice rotten siding, missing roof shingles, bad caulking, peeling paint, broken windows, and a myriad of other potential problems. This is the best time to have these problems reported to you so that they can be dealt with. They need to be on the top of your to do list. While these items may seem minor, they can lead to more costly repairs if ignored.
Because rotten siding is often a problem, a good professional painting contractor should have the ability to replace it before a paint job is performed. Peeling paint is a problem that can be addressed improperly and may become a recurring issue if this happens.
Peeling paint is often an issue that is addressed improperly and can be a recurring issue if this occurs. Peeling paint is very frustrating to homeowners who may spend money year after year only to have this not corrected. Power washing alone is not enough to resolve this issue.
The proper preparation in this case is to chemically treat all affected areas to kill any mildew growing in the bare wood crevices, accompanied with power washing to remove any loose paint. After this dries out, there will be lifting of the adjacent painted surface which you must then mechanically strip or hand scraped to remove any additional peeling. Feather sanding will round out this prep and is needed to reduce the bad appearance of scraped areas.
In the case where cedar shakes are peeling, these shakes must be completely stripped to guarantee that no peeling will occur in the future as shake shingles are much thinner than lap siding and are much more susceptible to thermal shock as the siding expands and contracts with the temperature changes.
Please take a suggestion from someone who knows: when dealing with peeling paint, do not skimp on preparation as you will be disappointed with the results! Peeling paint can however be put off until later if your budget does not allow for the complete and proper repairs. A professional painting contractor can serve you well in the maintenance arena and take some of the hassle out of your exterior chores.
Were not finished yet; we still have to address the interior of your home! The most misunderstood issue that we address each year on the interior of homes is in the area of touch-up versus repainting.
You should understand that unless you know the exact product and color that was used in the painting of your interior, its not likely that youll be able to touch-up. With interior touch-up, the end result should be that you cannot see where touch-up was performed. Most people dont know that one paint line will not touch-up another.
For example, if you were to purchase a contractor grade flat paint in basic white (no tinting at all) and tried to touch-up your original top of the line flat white, you will be able to see where you touched up because of the difference in sheen, rather than the difference in color. Most homeowners find this unacceptable but you may be able to live with this.
All is not lost if you dont know what product or color you have in your home. With a bit of work a professional may be able to get you close enough to meet your approval with a bit of work. Your contractor could remove a sample from inside a closet and have the paint store match color and sheen close enough to satisfy you, but very often repainting is the only solution to the most discriminating customer.
Be sure that when repainting the contractor leaves you with some touch-up paint marked to show where each color was used and also includes a document detailing products and colors in case the touch-up paint freezes or is lost.
You may also want to discuss with your contractor which finish best meets your needs and where to use them. There are a variety of finishes to choose from: flat, eggshell, satin, semi-gloss, and gloss. Each finish has its own unique benefits and draw backs. For example, if you are renting your home during the summer and find that each year or two your walls need to be touched up, you may want to consider using flat paint for all the walls.
While flat paint doesnt offer scrubability, it is easily touched-up, and is the most cost effective solution. I dont recommend using eggshell or satin on walls in a rental property: when you try to scrub a flaw from a wall coated with these finished you will burnish the surface. In other words, you will leave a shiny spot on the wall that most people find unacceptable.
Flat paint is usually the least expensive material in relation to the other finishes, and is the least expensive to apply, requiring two coats for coverage. It offers the ability to hide minor flaws in drywall surfaces and is the easiest to touch-up. All other finishes (eggshell, satin, semi-gloss and gloss) are considered enamels.
A common misunderstanding with homeowners is that eggshell is a paint color; eggshell is actually a sheen level. It is the least glossy of the enamels and is most used as an upgrade from flat paint. Enamels offer varying degrees of resistance to moisture and scuffing, but do not touch-up easily and often cannot be scrubbed without burnishing.
Often, when trying to touch-up enamels, a painter must paint entire walls or paint to breaking points to avoid being able to see differences in sheen. Each successive coat makes the surface shinier than the original and is very obvious when everything is dry. Homeowners usually find this objectionable and unacceptable.
However, if you do not rent your property, these enamels are often a great upgrade considering that homeowners will work a bit harder to prevent scuffing than say, a renter!
Semi-gloss paints are commonly used in bathrooms and kitchens due to their resistance to moisture. Gloss paints are usually reserved for trim work and offer a high degree of resistance to fingerprints and moisture. A consultation with a professional will help you determine which is best for you given your requirements and should be very helpful in determining which method and finish best suits your individual needs.
See how versatile a professional painting contractor can be in regards to your maintenance plan? They can provide you with more personalized service than you might get using several contractors for a number of small jobs. It just makes a good sense to use as few contractors as possible to achieve your goals, and is more cost-efficient. Who knows, you might even get your phone call returned! But remember, timing is everything, so dont wait call now.
Back to top
|
 |
Get Ready, Here it Comes!
The spring season is upon us and once again our collective thoughts turn to preparing our homes and yards for the new season. If you are like many others, you may have rental property on the Outer Banks that you need to get ready for the influx of guests this season.
You might be thinking its a bit early to start worrying about primping for the season at this point, but if you have medium to large projects to do, you had better get on the ball! You may not be aware that we have been dealing with a labor shortage here for many years, which nobody can seem to resolve. It seems that there is simply not enough affordable housing to accommodate the people required to support the service industry on the Outer Banks.
So, dont wait until April to get on schedule with a service company! You will find that it may be impossible to have your work done by a competent contractor at that time. There will always be people working for beer money that may be able to help you, but is that really the ideal situation for you to be in?
Last year, I recommended a contractor to a very close friend. This contractor was not my first choice, but after February, you take what you can get. Waiting until the next year was not an option for her. She wanted to enclose the ground floor of her home to be used as an apartment, which is a common project overall.
I recommended this person based on my own experiences with his company which have been good, but since then, his companys stability has been, well lets say diminished. What happened to her I would not wish on anyone, and I am thankful she stills considers me a friend. The contractor wouldnt show up for long periods of time, the product that he delivered was not what he promised, and on and on it went. A year later, the project is still not completed and this contractor is nowhere to be found. The price was good though! If you havent heard a story like this before, you simply havent been here long enough.
The spiffing up of rental properties will reach a frenzied pace here in the next few weeks, and if you are not already scheduled with a reputable contractor, you may be left to choose from, well, whos left to choose from. Worst yet, you may elect to paint yourself. Let me make a few suggestions that might make sense.
Painting, while seemingly simple enough, does in fact, cover a multitude of sins. Paint covers most surfaces in and on our home, and it if is dirty our unkempt, renters notice. Painting also delivers the most bang for your buck, in regards to curb appeal. This does not apply to every rental property, and there will always be a market for the inexpensive rental, but if this is not your home; you may feel the pinch that I am referring to.
There are currently more vacation houses available for rent than there are renters. This trend is alarming to many, and is not forecast to improve. Dont take my word for it: ask your rental company or realtor. This has been the topic of many recent newspaper and magazine articles lately, and while the Outer Banks is still somewhat unaffected by the recent drop in the markets, competition is heating up for the attention of prospective renters. It is becoming increasingly important to keep up appearances on your property to get repeat rentals. Do you see where Im going with this? Paint does cover most surfaces in and on your home, and if it is dirty or unkempt, renters notice. Painting also delivers the most bang for your buck, in regards to curb appeal. Now, I understand that this does not apply to every rental property, and there will always be a market for the inexpensive rental, but if this is not your home, you may feel the pinch that I am referring to.
Look at the exterior of your home. Does it need to be cleaned? Most homes should be cleaned each year to remove mildew, cobwebs, and airborne salt. If you havent done this yet, you might be surprised how good this alone will make your home look. More importantly, mildew can be a slippery hazard on your decks, and airborne salt is corrosive to the paint film on your home causing premature failure.
Salt is also corrosive to all types of metals as you already know, so this cleaning will also extend the life of hinges, latches, locks, screen doors, etc. Cobwebs harbor spiders, and I dont know of anyone who would have an aversion to removing those!
Cleaning can be performed at a very low cost in proportion to the curb appeal it delivers. Even large homes can be cleaned for around $700.00, decks and all. This is a very cost effective preparation, consider the lengthened life expectancy of the paint or stain job and the exterior metal fixtures. And, cleaning will give the cleaner access to inspect every inch of the exterior of your home in the process.
An on site inspection done at this time will make other more serious problems evident; missing roof shingles, damaged siding, water infiltration problem areas, toxic mold. If these problems are caught early, more expensive repairs can be averted later.
Consider a maintenance contract with a reputable painting contractor. A maintenance contract can augment the services offered by your rental company. When done in this manner, the inspection is built into the cost of cleaning, and performed at the end of the cleaning job itself. Our customers find this very convenient and they call us for other unrelated questions now as a result. A personal relationship is formed and trust is developed over time.
As to the interior of your rental home, the first thing that usually comes to mind is touch up. Whether its walls or trim, there is almost always some damage to these finishes yearly. Most of our clients are surprised by the amount of dirt and scuffs done to their homes each year and I always get a chuckle from their remarks. One client swears that renters are using his game room for racquetball tournaments. Others are not as soft spoken, but all usually have something to say about the way their homes are left.
When an owner realizes there is touch up work to do, they, or the rental company calls two or three painters for an estimate, and chooses one. That painter (not knowing what product was originally used) does their best to match the color, when they are finished they dont leave any touch-up paint. This scenario leaves the painter following him the next season guessing.
Seamless touch up cannot be performed unless the original product and color are known. Touch up can be a very low cost solution if these factors are known. If not, you may have to repaint over and over rather than just touching up.
This is where a maintenance contract can give you the personalized service that you want, and the cost effectiveness you should expect. Your maintenance contract provider will have a record of the product and colors used in your home and can touch up accordingly.
In addition, if there are leaks, or other problems that occur, they should have the ability to make those repairs or at least report them to your rental company for follow up. One stop shopping at its best has proven to be very cost effective for most people. As always, your trust should be put in the provider, so do your homework first!
This approach is not going to be for everyone. The do-it-yourselfers are a growing section of our marketplace and the success of the Home Depots is evidence of this. However, if you are like me, I find that I would rather spend my spare time enjoying life, rather than fixing the endless results of others living it, a maintenance contract could be the solution for you.
I am currently in dialogue with several rental companies who also see how beneficial this service could be to their own businesses as well as their owners. Done right, partnerships such as this can work very well, while increasing the level of satisfaction for clients.
I hope this has given you some new options for an old problem. Remember, think about spring cleaning early, and you will have one leg up on the competition.
Back to top
|
 |
Paint, Stain, Alkyd, and Acrylic? Help!
If you have ventured into a hardware or paint store lately, you may have noticed that there are a million different paints and stains available. As with any project, homeowners are often inundated with material choices and conflicting advice. Sometimes, advertising can be misleading, and there are definite no-nos to be wary of when choosing materials for any given project. Which product is best for a particular job can be difficult to sort out. Let me give you a few pointers which should help you choose the right product for your job.
Lets talk only about exterior painting. On the Outer Banks, there are a large number of homes in varying degrees of upkeep, the worst of which have been neglected, improperly coated, or treated with the wrong materials, causing premature failure. Dont let this be you! A good coating job here should last at least five years. If you are not getting that, you may not be using the correct material for your substrate.
Even the best coating will not perform properly if applied incorrectly. 95% of all coatings failures result from improper application of the coating! You must ensure that your substrate is clean, dry, and sound (not rotted). With these issues are covered, lets choose the right coating for your job, starting at the beginning, with primers.
The substrate that most commonly has coating failure is wood, both siding and trim. This is mainly due to the number of types of wood and varying degrees of soundness of the wood.
First, I would suggest that you check the wood for any signs of rot that might be present. Poke around with a pencil in some of the areas that stay moist longest. If your pencil goes through then the wood, or even partially through, it needs to be replaced.
Next, determine which type of wood you are dealing with. For the purpose of our discussion, you will only need to know if the wood is pressure treated or Cedar. Cedar is the most commonly used type of wood for siding and trim here on the Outer Banks. This is because Cedar has the highest concentration of natural oils, or tannin in the wood. This tannin resists rot more so than woods with little or no tannins at all, but when coated, this attribute can pose problems of its own.
If you are coating Cedar you will need an oil based primer that dries slowly and has tannin block ability. If untreated, the tannin in the wood will seep out over time, causing discoloration and staining of your newly coated surface.
I specify oil primers because the molecules of oil (or alkyd) primers are much smaller than those of comparable latex (water based) primers, which allow the material to penetrate deeper into the wood providing you with superior adhesion. Before applying this primer, however, you will need to evaluate the product to determine its viscosity. Many of the best products in this category are very thick and will need to be thinned down so that penetration can occur.
When a very thick primer is applied over wood, very little penetration occurs, leaving most of the product on the surface with very poor adhesion as the substrate expands and contracts.
If this is the case with your chosen product, use some clean paint thinner (mineral spirits) to get your primer to the point where it will penetrate deeply, do not worry about complete coverage yet. Thin is good in this instance, contrary to popular belief.
Also, as tempting as they can be, do not use fast drying primers for this application because they dry much too brittle and will crack and fail within one year as the hot/cold cycle works its magic. Many people find the quick drying materials attractive because they can be finish coated the same day, but for our environment, the substrate expands and contracts too much for a brittle primer.
The second most common type of wood you may be dealing with is Pressure Treated lumber. This can be identified by a green hue, and a stamp on the wood itself. Most commonly used for railings, decking, and support posts, PT lumber is sometimes used for window and door trim too. If your PT lumber is brand new, I strongly recommend leaving it untreated for at least six months so that it cures properly.
When PT lumber is manufactured, it is permeated with arsenic and stacked for drying. As soon as it stops dripping, it is on the shelves of your lumber yard for sale. While this lumber may appear dry and read under 15% moisture on a moisture meter, it is certainly not cured and will continue to leach the arsenic from within for up to 18 months as it cures.
When painted prior to this curing, frequently the paint will peel as the chemicals try to work their way out of the wood. This has been the topic of many a debate on the Outer Banks and painters have bared the brunt of the responsibility for this peeling, but now you too can consider yourselves educated.
The one exception to this rule is PT that is marked KDAT, or Kiln Dried AFTER Treatment. Very few contractors use this lumber as it is more expensive, but if you are one of the lucky ones, you may successfully paint this immediately.
For PT lumber, the best primers are latex, and very often do dry quickly. Make sure that the primer is for exterior use. PT lumber does not have nearly as much tannin to be concerned about, as pine is used most often, but you do need a primer that has stain killing abilities for the knots, and offers good adhesion. Look for those two attributes on the labeling.
Sometimes you will need to use two coats on the knots to prevent tannin bleed. PT lumber differs from Cedar in that PT lumber is much smoother and sometimes has a mill glaze that these latex primers address much better than the alkyd alternatives.
Penetration is diminished by the mill glaze and the chemical content of the wood, so go with the latex alternative. Mill Glaze is a condition that is brought on by the milling process whereby the wood can have a shiny appearance which prevents any coating from penetrating the surface.
If you notice this condition, a light sanding will pay off for you in the long run. Just sand enough to rough up the surface a bit, nothing too strenuous.
Some of the other substrates used commonly for the exterior of homes are HardiPlank cementatious siding, vinyl, and aluminum.
In most instances, these substrates do not require a primer and can be coated with a good quality 100% acrylic paint. Of course, you will need to ensure that all surfaces are clean, dry, and free of organisms first.
While that probably covers all of the pertinent exterior substrates, you may be dealing with an existing home that is peeling. I often find that homeowners with this problem are ill advised on the proper methods to repair this condition. Unfortunately, most painting contractors will not completely address this issue with the owner, if at all, and the result is a never ending cycle of touch-up and repainting due to continual peeling.
Peeling paint can be repaired so that this does not recur, although in most cases it is not cheap. If you have a peeling problem, the peeling areas should be stripped to remove all of the old coating, even if it does not appear to be peeling now. This is especially true in the case of shake shingles. Often a contractor will specify a scope of work which includes pressure washing first then painting. Pressure washing alone will not remove enough of the defective coating to ensure that the remaining areas will not peel in the future. Any coating left will usually continue to peel for years to come ruining any new paint work.
I have personally spent many hours on this problem trying to educate my fellow painters and my customers on this issue and I can say with great authority that there is only one way to permanently fix this problem.
On to finishes... Finish coat products also come in many forms. By understanding the factors involved in the deterioration of each finish, you can easily make the appropriate selection.
Generally speaking, as long as you have properly prepared and primed the substrate, the biggest factor that will cause a finish coating to fail prematurely is UV light.
The sun will dry out a coating and over time will cause a condition called chalking. You may notice this on your home if you rub your hand on the surface and the coloring appears on your hand. At this point, the coating will actually retain moisture instead of repelling it and will deteriorate more rapidly as time goes on.
When choosing a finish coat for any surface, use quality material, which will pay for itself in the long run. I recommend using a product that has a sheen, which will reflect UV light better that flat paint or stain and will last longer.
These sheens come in varying degrees of reflectivity and price, of course. Latex stains are best on wood siding and should provide you with the longest lasting jobs.
Most exterior latex stains available today come in a flat finish. There are latex exterior stain products that have a sheen, but you will have to do your homework and ask for them.
For pressure treated lumber, as well as the other substrates that I mentioned, paint will serve you best. Use latex paints that are labeled 100% acrylic, as they are the best product available today and easily found at any paint store. Latex paints and stains also resist UV light deterioration much better than oil based comparables.
The biggest difference between paint and stain is the consistency and the solid content of the material. Paints are usually much thicker than stains and have a higher solid content. The higher the solid content, the longer the material will last.
Finally, consider using the new generation ceramic coatings. These products usually offer superior warranties which cover defects in labor and materials, but usually can only be applied by certified contractors. These products offer the best in protection for all substrates but will cost more initially.
Material choices can be confusing, but stick to these guidelines and you will make better informed decisions. I always recommend that if you are not sure what to do, call a pro. Good luck!
Back to top
|
 |
Industry Standards - For Your Protection
Eventually, inevitably, you may find yourself painting or hiring a professional painter to paint for you. When painting your home, you are most likely coating the most expensive investment you will ever make. It doesnt make a lot of sense to choose products or companies that perform beneath the standards of good quality.
Standards are there to ensure fairness and quality for both the consumer and contractor. Why? Paint is paint and painters are painters, right? Not so. There are standards in most areas of sales and manufacturing that ensure the quality of service and products in those areas.
A great example of this would be the uniform building code. How would you know that the wiring, plumbing, and framing were safe and reliable otherwise? You may never see inside the walls of your home and if these standards were not in place, the world would be a much more dangerous place. And what if there were no health department standards for restaurants?
Everyone needs the piece of mind that standards provide, whether you are buying a car, building a home, or even painting a house.
While a botched paint job is not as dangerous as a deck that falls down or salmonella poisoning, painting projects can hit you where it really hurts- the pocketbook. If you are painting outside every 2 to 4 years, this has special meaning to you.
Standards in the painting industry are set by the PDCA (Painting and Decorating Contractors of America) and the MPI (Master Painters Institute) and are widely recognized by architects and government agencies world wide.
The PDCA provides detailed standards to the pro and consumer alike, which encompasses scope of work, job sequencing, and the availability of the areas to be coated.
However, these standards are usually overlooked in the residential repaint market. Most folks just dont realize that there is actually a specified method to coat any surface, in any condition, and with very specific materials.
Architects, for example can only specify products endorsed by the MPI and will insist that PDCA standards be followed for job sequencing. The main reason for this is because the architect represents the owner and not the builder. The architect recognizes that it is commonplace in the building industry for a builder to circumvent the standard job sequence when it suits his needs. Most often this happens when the builder gets behind schedule and the potential problems get worst as the final deadline gets closer.
It is impossible to achieve the proper finish on any given surface if, for example, there are carpenters cutting in the same room the painters are coating trim. This becomes evident in shoddy workmanship and premature failure due to improper procedures. And the person who ultimately bears the brunt of the repercussions is the owner.
Unfortunately, most painting contractors dont make the customer aware of these standards either, usually because they are not aware themselves. It can be very costly to the owner when the standards of quality are overlooked in the interest of a low price. I find that these standards give me an impartial, third party endorsement that ensures the client of a job well done- as long as I perform all work according to the PDCA standards.
It certainly benefits the painting contractor to incorporate these standards into their contracts, especially when working for building contractors.
In the repaint market, when customers gather estimates, they encounter a wide variety of pricing and recommended procedures.
While it is most often true that there are a number of ways to go about coating a property, there is usually only one proper scope of work to follow. For the uninformed property owner, this becomes a quagmire that they usually cannot sort through by themselves, and generally end up choosing the lower price, assuming that they have compared apples to apples.
On the Outer Banks, I find myself frequently defending my recommended procedures pertaining to exterior painting. Often the customer has three other estimates that do not include hand scraping after power washing, for example. All of these other painters said that power washing is good enough, you are just trying to sell me something I dont need.
My quandary at this point is how to tell the customer that all of the others are wrong. That in fact, if those other contractors do this work, statistics say that you will most likely need to repaint again within one year. When the customer hears this, you can usually see their interest peak.
Peeling is a very common problem here on the Outer Banks, mainly due to moisture and poor workmanship. You should never paint a surface (especially wood) unless the moisture content is less than 12%. You may want to ask your contractors if they even own a moisture meter, most dont. It is a statistical fact that over 90% of all coatings failures stem from high moisture content at the time of application.
When this is accompanied by the "power wash and paint" method, you are certainly doomed to spend good money after bad. Chemical treatment must be done prior to any exterior coating project in order to kill any mold or mildew that may be on the surface, whether you can see it or not.
Pressure washing is usually used to rinse the chemical from the surface and any loose paint or dirt should be removed as well. The wood expands from the water used in pressure washing being absorbed by the wood, and as it dries, it shrinks. Most painters will tell you they are now ready to paint.
What really happens next is that as the surface dries, it shrinks. There will always be a need for additional hand scraping and sometimes sanding to remove the now newly loosened paint around the edges of the bare wood.
In these cases, the paint that remains after pressure washing may appear to be tightly adhered to the substrate, but as the new coating dries on top of the old, it shrinks and forms a mechanical bond to the old paint. As the new coating cures, the shrinking will cause the bond of the old coating to the substrate to fail.
If painted over, these loose edges will peel. In extreme cases, the peeling may be so severe that stripping may be necessary. This can easily be determined by a field adhesion test at the time estimating and should be done on every job. This test is very simple and is recognized as standard procedure in the MPI craftsmans manual.
The results are a brand new paint job that needs repainting-and stripping. This can be costly, but this is actually what needed to be done the first time, if you only knew. Pay now or pay later, there is only one proper scope of work for any given paint job. So, you can see how standards are in the consumers best interest.
Coatings also come in a wide variety of quality. If uninformed, you may think that they are all the same. The reality is that some cheaper coatings are not worth the money.
Did you know that for most coating 60-70% of what is put on the house will evaporate into the air? That means that only 30-40% of what you pay for remains as the protection on your property. How is the consumer to know? Honestly, you shouldnt have to. Your painter should be able to inform you as to the reasons for the procedures and materials that he recommends for any given job.
The contractor you choose should be one that represents you and is able to provide cost effectiveness in the work performed for you. While almost anyone can perform the simple act of painting, there actually is an awful lot to know when it comes to painting professionally.
True professionals care that their customers feel that they have received value from the work that was performed. I also think that professional contractors should be concerned with their trades in general.
It is clearly evident that the painting trade has had the bar lowered in recent years and that true craftsmanship, and more importantly value, is suffering. I am extremely honored to b on the newly founded Forum for Excellence in Craftsmanship, which has been charged with writing standardized guidelines for formal training for professional painters worldwide. I feel that once completed, there will be a new standard by which all painters can again be measured.
When the dust settles, consumers can once again rest assured that the professionals they trust with their most expensive investments are actually trustworthy professional.
Since the painting trade is not yet officially regulated by any means, the consumer is unfortunately left at the mercy of the contractors they requested quotes from. The easiest way for the consumer to ensure that the contractor is truly professional is for them to determine whether the contractor follows the PDCA standards. After all, countless hours go into the determination of those standards, shouldnt you take advantage of them so that you dont have to worry about being taken advantage of?
Back to top
|
 |
The Pleasures and Pitfalls of Deck Sealing
After a long day at work, I often find comfort and peace just sitting around on my deck. I have outfitted this space to be my own, with plants, nic-nacs, and of course, my grill. We even had a hot tub installed, sunken into the deck for ease of entry.
My contractor built the deck with pressure treated lumber and decided to wait until the deck needed a sealer before applying any treatment to it. You see, pressure treated lumber (often called salt treated), is permeated with a preservative to prevent rot, so left untreated it will last for nearly twenty years without rotting or damage from termites, or so they say.
What really happens is that the wood will eventually become very dry, opening up cracks and shooting up splinters; not the best surface for running around barefoot. After time, nails will back out and poke up from the constant expanding and contraction of the wood.
If you are noticing these drying effects on your deck you may want to consider using a sealer to preserve the integrity of the wood. After all, who wants a deck you cant go barefoot on?
Often with projects such as this, after you get into it --or should I say in too deep--you realize you might need help. (I personally suffer from the insidious carefully-read-directionitis gene deficiency.) I might be able to steer you toward your goal if you heed these suggestions and warnings and if not, call me, advice is always free.
Please heed suggestion number one if your pressure treated lumber is not stamped KDAT, you should wait at least six months before applying any acrylic finish or sealer, this includes any type of paint or stain. Chemical leaching and drying out of the wood will cause peeling and possibly other types of material failure.
The next thing you should do in this project is choose a product that is right for you. There are an endless variety of sealers which can be used, some of which are marketed aggressively. You have probably heard of Thompsons sealer and others, but just because the marketing is good, it doesnt mean those products are the best.
Basically there are two classes of products for this application: oil based and water based acrylics. Most products available to the consumer are of the oil based variety, and typically these products really last about two years with an initial application. Look at the labels and take notice of how you should clean up your brushes and equipment. If clean up is with thinner or mineral spirits, you are looking at an oil based product.
Acrylic based products typically last from three to eight years depending on the number of coats applied, and these products clean up with water and detergent. As with any coatings material, these products each have pros and cons.
The longer lasting acrylic products cost more per gallon, and usually require additional coats in the initial application. The acrylics also can be applied to a wet surface, which is actually a benefit since you always need to clean the surface before coating. Acrylic products will allow you to clean the decks and seal them the same day, which is a major no-no for the oil-based products.
Oil based sealers must be applied to a clean, dry surface, so after cleaning, you will need to wait a couple of days before sealing.
Both classes of products will also come in a variety of colors, all of which are transparent allowing you to see the wood grain detail underneath.
These colors give you a wide variety of hues to choose from and I suggest picking up some samples to bring home. Unless you want a clear sealer, you will want to see the samples next to your house to avoid having the sealer color clash with the existing siding. Both oil and acrylics offer clear versions of the product, but beware especially with the oil based products; these will offer the least protection and longevity for the money.
As with all paints and sealers, the ultraviolet rays emitted from the sun are the biggest factor in the deterioration of the material. These rays dry out the material over time and render the protection ineffective. Oil based products in general do not weather nearly as well as their acrylic counterparts, so consider this when setting your budget.
Once you have decided on a product and color, you will need to determine how much material you will need to finish the job. You do not want to run out of material in the middle of the job, this could cause unsightly overlap marks, which are virtually impossible to remove.
Measure the square footage of your deck by multiplying length times width. Keep in mind that deck surfaces are usually sealed only on the top, where foot traffic occurs, but you may opt to coat the underneath as well. If so, multiply your figure by two.
If you will be coating the handrails, you will need to measure those as well. Measure the length of the rails in their entirety. Then measure the height from the deck surface to the top of the cap. Multiply the length times height and the multiply times two, to account for both sides. If you will be sealing other things such as band boards or lattice, measure them as well then and add up all of your figures all to arrive at a total square foot figure. This will determine how much material you will need to finish the job.
Each material will have slightly different spread rates and you will need to read the labels of each to determine how many square feet per gallon each product will cover. In fact, if your budget is tight, you may want to measure before deciding on a product.
Now that you have your materials, you are ready to clean the decks. You will need to use a chemical to kill any mildew, and possibly a brightener if your decks are grey and weathered. This chemical step is critical, even if you dont notice any visible mildew.
Mildew is a microscopic organism and is often invisible in the early stages of infestation, but must be killed before applying any coating. If left alive, the mildew will continue to grow through the sealers film and then will be virtually impossible to get rid of, short of stripping the material and starting over. I recommend a combination of mildewcide and brightener, and personally prefer Flood products. You can find a dealer near you online, but all major manufacturers produce similar products.
Before applying the cleaners, you will want to protect the surrounding surfaces as required by the products label. Most cleaners will kill plants and grass if they are left unprotected, but if you keep them wet throughout the process the chemicals are usually diluted sufficiently and no damage is sustained.
Always read the labels carefully and apply the warnings to your situation to avoid damage. If your deck has been stained or sealed before you will probably need to strip the old material from the surface. If your deck has been sealed and you simply want to use the same product and color, you can usually apply another coat after a thorough cleaning.
The most common way to apply these cleaners is through a power washer with a chemical pickup tube. If you do not own a power washer you can easily rent one from your local paint supplier or hardware store. Ask the dealer to give you a quick lesson on its usage, and be sure to ask specifically how to use the pickup tube.
Mix your chemicals in a five gallon bucket and put the pickup tube into the mixture. With the chemical applicator tip on the wand, apply the chemical to all needed areas and wait about ten or fifteen minutes. You will see the wood return to its original color right before your eyes.
After the prescribed time, begin rinsing the chemical thoroughly. To rinse properly without damaging the wood surface always use the least harsh power washer tip and keep away from the surface of the wood. If needed, you can get closer to the surface to remove thick buildup of mildew or other contaminants, but beware, most power washers will irreversibly damage wooden surfaces if you get too close or use too harsh a tip. A good rule is to always use the least amount of pressure needed to get the job done. You will want to avoid making the wood appear fuzzy.
Continue to rinse the surface until your rinse water runs clear and is free of all yellowish color. Lastly, rinse all surrounding plants and grass.
If you have chosen an acrylic sealer, you are now ready to apply the base coat of sealer; if not, clean up and relax for a couple of days.
Before applying any sealer, you will want to protect all of the surrounding surfaces that you do not want to get the material on.
Realize that the sealer will drip down through the deck boards, and you may need to cover any concrete or other surfaces under the decks with drop cloths. Also, depending on your application method, you may need to protect some of the siding or trim that might be over-sprayed if you choose a pump-up type sprayer to apply the material.
Pump-up sprayers are often used to apply these materials since many homeowners already own one for spraying herbicides and pesticides. Be sure to clean out the sprayer thoroughly before and after use--these materials can clog the tip irreversibly and ruin the pump if not cleaned properly.
If you are brushing, buy a large brush, either 6 or 8 inches, and maybe even one that fits on an extendable pole. This will allow you to do most of the work in a standing position, dipping out of a five gallon bucket.
Either way read the label on the material and apply it according to the directions with the appropriate number of coats and drying times. You want to avoid stopping the application in the middle of any given area and starting again once the surrounding area has dried a bit, as this will cause unsightly lap marks. They can be avoided by starting in a corner and running two or three boards in their entire length.
If sealing the handrails, do those first and partially cover the deck to avoid dripping; those drips will also turn into a type of lap mark that is not easily repaired.
Generally work from top to bottom and work quickly. Again, pay close attention to the label and recoat as recommended with the appropriate drying times between coats. Refer to the label to see how long you should wait before replacing any furniture or planters.
I used an acrylic sealer on my decks, rails, bands, posts, and lattice. While the acrylics are more expensive, and harder to apply, it will keep me from doing the decks every two or three years. Whatever you decide to use, follow these suggestions and you are sure to enjoy a great looking deck for years to come.
If you enjoy this column and have any suggestions for topics or questions that you might like answered, please write me at info@beachpainting.com, or call us at 252-441-8224 ask for Jim.
James Ashe is the owner of Beach Painting Contractors, Inc. He resides in Kill Devil Hills and is the President of the Outer Banks Chapter of the Painting and Decorating Contractors of America (PDCA).
Back to top
|
 |
Power Washing - a great way to start your spring cleaning!
Spring is here! The air is crisp and clean, the temperature is rising, and everything is covered with a winter film of salt spray, gunk and of course, bugs. Time to power wash!
Power washing is a logical and cost effective start to any spring cleaning. With a little direction and a bit of elbow grease, you could be on your way to a great season with return bookings for the year to come.
Renters are becoming increasingly discriminating, and the homes that rent most often are those that stand out amongst the sea of cottages available. Homes that are not meticulously cleaned and maintained do not enjoy the return bookings that used to be taken for granted.
Ask any sales or rental agent and they will tell you that curb appeal counts for a lot. When renters pull up to a home that is dirty on the outside, they will usually start looking for other situations that arent to their liking.
Very often, power washing is all that is needed to get the outside of a home presentable and ready for your guests. Not only do you get the benefit of a good cleaning, as you perform this task, you will get the opportunity to inspect for signs of failed caulking, siding and trim rot, and other tell tale signs of trouble.
Last year we fielded an unusually large number of calls from rental agencies requesting emergency power washing. Since the wind blew almost exclusively out of the West for most of the summer, the east sides of rental homes were the gathering places for swarms of mosquitoes and spiders,and renters were very vocal about having those cleaned up right away. As the wind continued to blow from only one direction, the problem recurred each week and many homes were power washed each turnover day so that the property would be ready for the next guests.
It became evident how important cleanliness really is to renters and their happiness. The Better Business Bureau gets thousands of requests for information on reputable companies who perform power washing each year. If you do not plan to attempt this yourself, you should ask your local BBB about the companies that you intend to solicit.
If you do plan to attempt the power washing yourself, look at your needs. Perhaps you intend to clean the outside of your home, your car, your driveway and maybe even your decks. All of these require only minimal pressure-it would be a waste of money to purchase a machine that delivers 4000 PSI (pounds per square inch) at 3.5 gallons per minute.
We have had more success with much smaller machines that deliver between 1800 and 2500 PSI and up to 2 gallons of water per minute. These machines are also much lighter, take up less space, have fewer bells and whistles (to break), and are less expensive.
The most common mistakes made by do-it-yourselfers when power washing are that they are too aggressive, use too much pressure and often ruin the surfaces that they are trying to clean. You can easily ruin decking, siding, concrete, and other surfaces with a power washer. For small, intermittent projects the smaller electrically driven machines will serve you better.
You can, also, rent a machine from your local paint store, hardware store or rental store. If you have never used a power washer or are a little apprehensive about using machinery that you are unfamiliar with, this may be a good idea. The rental agent will be happy to give you some directions and familiarize you with the equipment before you start. Rentals usually cost about $35- $50 per day and most jobs can be completed in a day.
Whether renting or buying, here are some basic things to consider. You will need a garden hose and about 3-5 pounds of pressure to run the machine without starving the pump of water. Most homes do have adequate pressure, but some properties that use well water and have an old pump will not have enough to run the machine property and will overheat the unit.
You will also need some pressure hose and a gun. These usually come standard with any purchase or rental, but check to make sure. Think about how much hose you will need, so that you are not moving the machine around too much, and make sure that you can reach the highest point without having to elevate the entire machine. You may need ladders or specialized equipment such as a 24 foot extendable wand to reach higher places from the ground.
Be extremely careful when operating pressure-washing equipment from a ladder. When you initially pull the trigger on the gun, the resulting blast could knock you off balance, causing a fall.
Make sure that your unit has a chemical injector as standard equipment. It is much faster than applying a cleaner through a pump-up type garden sprayer. It allows you to pick up chemicals that will kill mildew and brighten wood to its natural color. It can also be used to apply soapy water to cobwebs, your car or vinyl siding prior to rinsing. Soapy water takes the stickiness out of cobwebs, so they become much easier to remove.
Once applied, all chemicals need to be rinsed. The omission of this step could cause a chemical burning of the surface. When rinsing, you want water volume, not pressure and the garden hose delivers greater volume than the power washer. When applying chemicals, keep plants, grass, and anything else you want to protect from the chemical wet. This will ensure that the chemical will be diluted sufficiently to keep from damaging the item. Chemicals will burn you too, so for big projects invest in some rain gear for yourself.
Anytime you will be painting something outside, you must chemically treat the surface to kill mildew first, even if you cant see it. Mildew starts out very small, and only when there is an entire colony growing, do you readily see it from a distance of more than a couple of feet. If mildew is not completely killed prior to any coating job (even clear deck sealers) it will continue to grow underneath your paint or stain.
Power washers can help with a large variety of cleaning chores. This also means that there are a large variety of methods and materials to choose from, so when in doubt you should always check with someone in the know.
Now that you have the basics, get out there, maximize your rental potential and protect your investment simply by cleaning. Its definitely time well spent.
Back to top
|
 |
Cost effective tips for maintaining your rental property.. and your sanity.
As the spring season approaches I naturally get a renewed vigor for all things clean, green, and robust. I just cant seem to stop cleaning, planting, cutting grass, etc. The seasons seem to have a way of changing just as you think you couldnt stand another week of wind and rain; typical of the shoulder seasons here on the Outer Banks.
But as the weather improves, the majority of homeowners here also prepare for the inevitable rental season. Each year seems to be more urgent than the last, as the rush to completion dominates the lives and schedules of the casual painter and professional alike. As I have often mentioned in this column, painting or power washing is the most frequently required maintenance on any home, and more so for rentals properties so do it right the first time!
Inside or out, painting is often the most costly segment of any yearly budget. Done improperly, a ten figure outlay could be completely wasted on a poorly repainted exterior. Using the wrong paint inside could ensure that your hallways need extensive touchups each year or worse, complete repainting. Usually these issues manifest themselves within one year, and worsen the sting of a poor choice with immediate disappointment. Here are a few tips that will definitely save you money and give you more time to enjoy your trips here.
First and foremost, use the best quality materials that you can afford. The cost of materials in any coatings job is much less than the cost of good labor to apply it. Naturally you should make sure that your investment in that labor is a good one too. Ask around, check references, call the BBB, etc.
When painting inside, take an honest look at your own current needs. If you have owned a rental property for any period of time, you may already know that these workhorses take more abuse than your ordinary primary residence. If you are new to the rental market, take heed. The areas that seem to bear the brunt of damage are those walls in narrow, close hallways, bathrooms, and definitely doors. I have also noticed that the more elegantly appointed properties are treated more gently usually. Perhaps the apparent allure of negligent indulgence is reduced by the fear of ruining a more expensive home, but who knows. Dont shoot the messenger here, Im really not cynical about the tourists that do by the way, feed us.
When painting walls, consider using a coating that is resistant to scuffing, life a ceramic coating for maximum wearability and fade resistance. These ultra high quality coatings also can provide an insulation factor, adding to their cost effectiveness. Most major manufacturers are making some variation of these products now, so ask around in your area. If those coatings are just not for you, certainly anyone can afford to use a good quality 100% acrylic semigloss, satin or eggshell finish. All of these enamel coatings usually require a base coat primer and two initial finish coats for uniform sheen. Even the flatter eggshell finish casts a sheen, and flaws are more readily evident in poor quality workmanship with these products. As a rule, the shinier the finish, the more wearable, but unfortunately drywall imperfections are magnified and show through the finished product.
In most newly constructed homes today, walls and ceilings are being textured with drywall compound of some fashion, which is much easier to produce than a good smooth wall or ceiling. To reduce labor costs, knockdown or splatter coat finishes have become more popular than ever and are great when painted with semigloss, satin or eggshell paints.
When painting trim, you should look for the same attributes as walls, but use a slightly shinier finish such as a gloss or high gloss urethane modified acrylic coating. I know that is a mouthful, but your supplier will be familiar with these coatings. It used to be that oil coatings were the best choice for trim since they dry harder that the acrylics, but times have changed and the newer urethane modified coatings are superior. Oil based coatings are on their way out and soon will no longer be manufactured.
Realize that with all projects, you should initially get enough paint to do the entire job and an amount for touch up. I recommend purchasing enough paint for a two year supply of touch up. The cost is not that great and this one step alone will save you money for years. Mix all of the paint together in five gallon containers before beginning and then repackage for long term storage after completing the work. If you choose not to buy enough for touch up, at least keep on file the exact product and color. One product will not touch up another, even if the color is the same. Subtle differences in the finish will show, giving a spotted appearance.
When considering exterior projects, you should follow the same basic rules for materials and labor purchases. Since these projects actually protect the entire property from moisture, mold and sun damage, you should really be more concerned with the quality of both material and labor decisions. A poor choice in either of these areas will cause you to repaint much more frequently, costing tens of thousands of dollars more than you should be spending over the same time period. If you are not getting at least five years and up to ten years from your exterior jobs, you should reconsider your approach.
Again, the ceramic lifetime coatings perform best and often their warranties cover the application labor as well. They are about twice as expensive as other professional jobs, but with the warranty definitely pay off within less than five years. These coatings also provide substantial insulative qualities which mean less thermal expansion of the siding and trim. This helps to protect the weakest link in the siding system, caulking. These coatings will usually be suited for any type of siding or trim, but ask first. If these coatings are not for you, the type of siding and trim will dictate which type of product to use. Stain and paint are very different in their intended uses. There are so many different situations to consider with exterior projects that generalizing here could be disastrous, so ask at your local paint store before making any decisions here.
The last thing to consider is caulking. Failed caulking causes more rot and mold damage than any other single source, and is very often completely overlooked until the damage is all too evident. Use the best caulking available when repainting outside or you will regret it sooner or later.
These tips should be helpful and if your specific situation is not addressed here, ask around at your paint store. Good material and labor choices up front really do pay off in time. Vacation homes are meant to help maintain your sanity, but with the wrong choices, you could lose your sanity maintaining your vacation home!
Back to top
|
 |
Before you begin...
Here we are at the close of another rental season, and it is once again time to start that all important list of things to do before the next one. If you are like most people, painting in one form or another is on that list somewhere. If its not, you might want to rethink your priorities. In this increasingly competitive rental and sales market, cleaning and painting may be the to do that sets your property apart from the thousands of others marketing to your clients. I thought this time we might talk a bit about what you should consider before starting that project... or hiring someone to start it for you.
Before you do any outside painting at all, first remember that anything you coat will have to be cleaned first. This ensures that you will kill any mildew that may or may not be seen with the naked eye. If you do not kill mildew, it will continue to grow, even underneath of your new coating! As if thats not bad enough, mildew will feast on your new paint job until the coating is gone completely before turning its attention to the siding or trim. If you intend to clean yourself, make sure that you can plan to paint as soon as the substrate dries out. Remember, that you are not only cleaning to kill mildew and remove surface dirt, but also any residual salt contamination as well. If you wait too long, surely a fall storm or mist will deposit more salinity on the surface, retarding adhesion.
For interior jobs, cleaning may still be required. In kitchens, it is common for grease to build up on walls and ceilings. Use a product designed for grease removal and then be sure to clean any residue left by the cleaner with water. If smoke is a problem, use an appropriate cleaner to remove any dirt or grease first, and then use a prime coat of a stain killing primer, such as Kilz, to block the stain left by the smoke. These primers are usually oil or alcohol based and will require the appropriate brush and roller cover. On trim, remove any dirt, or dust prior to painting for a nice, smooth finish. Sometimes baseboards behind furniture or appliances can get pretty scary, but suit up with rubber gloves, and youll be just fine.
Remember, when painting any surface that has previously been painted with a semi-gloss or gloss paint, always scuff the surface after cleaning and before painting. Use 220 grit sandpaper which will scuff the shiny surface and allow the next coat proper adhesion. If youve ever been able to scratch paint from something with your fingernail before, this step was surely omitted.
Most hardware stores sell chemical products designed to degloss surfaces prior to painting, but these chemicals are prone to harm surrounding surfaces, so be careful. These products are marketed as easy to use or eliminates the need for sanding, but beware, they are still wiped on with a rag, and are runny. After all, isnt wiping the same mechanical motion as sanding?
After cleaning, you must make sure that any surface you will coat is dry. Wood usually takes up to two days and if you dont have access to a moisture meter, better to be safe than sorry. Painting surfaces that are above 12% moisture will surely mean peeling later and no matter what any painter tells you, you cant tell by looking or simply touching. Other surfaces that are not porous will dry much more quickly and can be painted sooner.
Next, make sure you cover any surfaces that you dont want painted. When using drop cloths, think about where you will be using them first. Dont use plastic unless you absolutely must. Plastic is slippery, and unruly. Consider investing in a rubber backed drop cloth. They come in many sizes and you will probably paint something again anyway, right? Actually, you might be surprised how often you can use it for other projects too. The rubber backing will ensure that if you do spill paint, it wont seep through onto your carpet. Also, if you intend to use the cloth over a tile or hardwood floor, you will notice that the rubber backing will prevent slipping, more so with a ladder on top of that cloth.
Studies show that thousands of falls occur each year attributed to the neglect of this one step. You may know that placing a ladder, or for that matter, even walking around on plastic or a regular drop cloth over hardwood floors or tile is very slippery. When using tape, make sure that you use a tape wide enough for your intended use. I like two inch tape for most uses, but when I tape off base boards, I like to use a three inch pre-taped paper. This is easy to use and covers enough of the base so that it hangs over the drop cloth. I like to fold my drop cloth up neatly so that it has a nice straight edge and is at least four feet long. This can easily be moved along under the taped paper so that there is no chance of making a mess when rolling.
Remember that the faster you roll, the more splatter comes off of the roller nap, so be prepared. Another thing to consider when taping is the length of time that you expect to leave the tape up. If you intend to leave tape on for over a week, invest in painters blue tape. This is designed to be safely released from the substrate for up to fourteen days without becoming a problem. You do not want to experience this problem, take my word for it. When this happens, the tape sticks to the surface and will not come off easily. Usually you will spend hours removing quarter inch strips of tape, wearing off your fingerprints and wearing down fingernails. This is especially true when taping outside, since the heat of the sun tends to cause the problem much sooner.
Some other items on your pre-paint checklist might include a paint can opener, or five-way, rags, spackle for nail holes, sandpaper, caulk, an empty gallon can, and did I mention more rags? A five-way has a point for cutting, a flat edge for opening cans, a straight edge for spackling, a circular cutout for cleaning roller naps, and one other doo-dad, the purpose of which escapes me now, but surely must be important to rate that fifth number. Always have plenty of rags on hand because when you need them, you need them. Its good to have several since once youve used one; it then has wet paint on it. Anywhere you put it, also has wet paint on it, and so on. Get the picture? Seems so simple and yet.so frequently dismissed. You will always find a use for spackle. I recommend lightweight vinyl spackle for small imperfections and nail holes since it dries so quickly. Sandpaper for the spackle e` voila! Keep some caulk and a caulking gun handy for gaps in trim and such. You might also want to caulk the tubs, showers, and countertops to the wall in the bathrooms to prevent damage from water. The empty gallon can is extremely useful, and if youve ever tried to use a brush directly from a full gallon of paint, you know what I mean. Pour a small amount of paint into the empty can, and you will save your brush from becoming a sloppy hindrance, and yourself lots of aggravation. Oh yes, that fifth use for a five way the straight edge is also beveled to help you scrape dried paint from everything that didnt get covered well enough!
Lastly, choose your products carefully. Go to your supplier and ask questions. Tell them where you will be painting, and how you expect the coating to perform. Choose the right sheen for your intended use, flat, satin, semi-gloss, etc. Use the right brush, and roller for the chosen paint. Ask questions. Remember a cheap paint is just that . cheap! Do yourself a favor and dont buy cheap materials. Very often an extra coat will be needed, and your time is worth more than another gallon of paint!
If this is all more than you want to tackle yourself, you still have some prep work to do. Do your homework before you hire just anyone to paint for you! You might be surprised at the range of professionalism in this field. Check a firms website, if available. Check references and check with the Better Business Bureau, but for your own sake. check! Dont get burned and then just have to turn around and do the job over again. Painters are infamous within the construction trades for being unprofessional and for good reason. It is very inexpensive to purchase a brush, a roller, a drop cloth and some business cards. This surely does not translate into craftsmanship, customer service or ethics. You get the picture.
Well now that youre an expert, go get em. Make your property the shining example that will stand out above the rest, and better your chances for having repeat customers for years to come! After all, appearances really do translate into appeal.
Back to top
|
 |
Paneling... To Paint or Not To Paint?
People ask us to paint old paneling. After all, that old paneling can be rather depressing after a while with its dark tones. Almost every time someone calls us to request a quote to paint interior paneling, they are amazed that there is so much work involved. Most folks that have never tackled this monster assume that a wall is a wall, bada bing - bada boom ... painted! Not always so. When done right, this project can yield big bang for your bucks, but if botched can be a real nightmare to repair and will look hideous until done right. These tips should help you avoid some common mistakes.
There are several types of paneling that regularly get spruced up with paint. Pre-finished and T&G paneling are used most often, and with each type of paneling comes a different coating system. So these are the two we will discuss here.
Pre-finished paneling is the most frequently requested type to be painted and the most frequently botched as well. This type requires the most intense preparation of any of the paneling. It is so labor intensive folks tend to cut corners when tackling this job. You will recognize this type of paneling as being shiny with a wide range of finishes and colors. It usually has milled grooves which are often black or brown, and comes in very thin 4x8 sheets. Since pre-finished paneling is inexpensive as an interior wall system, it is used gazillions of homes, virtually everywhere.
Start by cleaning the surface with a degreaser/deglosser purchased at your local hardware store in the paint section. You must first remove any grease or dirt from the surface and the deglosser will do this. It will also eliminate the need to sand the shiny surface before the prime coat. Depending of the type of deglosser used you may still need to lightly sand the surface if you expect extreme wear on the walls, in a hallway for example. Check to make sure that you have removed the shine and have given the new paint something to grab onto.
Next, prime the paneling with a stain blocking primer designed for glossy surfaces. I like to use an oil based primer such as Kilz which will provide good adhesion while blocking the stain that will occur in all of the grooves. Use a 9 roller to roll the walls out, but be sure to brush enough paint into the grooves as you go. You will find these grooves hard to cover properly with finish paint so take your time with the primer. Make sure that you have adequate ventilation, since most oil based paints will make you woozy in a confined space.
After proper drying time, you can apply two coats of your chosen finish using both the roller and brush for the grooves. When corners are cut here the paint will scratch off with the slightest touch revealing the dark wood underneath or the grooves bleed through several coats of finish, or both.
Another common type of wall finishing system is called T&G. This stands for tongue and groove and gets its name from the coupling system which resembles. T&G is much more expensive to install and finish and was usually used in more upscale projects as wainscoting. In older homes it was almost always painted and usually called beaded board since the style of the times was to include a small bead on the edge of the individual boards. Today on the Outer Banks more and more builders are including this wainscoting in their homes but usually finish it with clear polyurethane. This type of paneling is designed to float to allow for expansion and contraction with the different seasons.
While it may be tempting, you should never endeavor to caulk the tongue to the groove since inevitably the caulk will fail and crack, looking worse than the original engineered groove. When wood is finished clear, with a polyurethane or stain, the grain and natural look of the wood disguises the grooves, joints and cracks. Once paint is applied to change the look all the cracks seem to jump out at you. This is when most folks try to caulk those grooves. Be forewarned, if you cant deal with the old bead board look, dont paint it.
If you choose to paint T&G, again start by cleaning and deglossing as described above. Next, you should apply a stain blocking primer but you will find these grooves much quicker to deal with. Use a brush and roller to apply both the primer and two coats of the desired finish paint. I like latex paints (and think that you will too) either in satin or semi-gloss sheen for most of these situations since it cleans up easily and is much simpler to use than the oil based finishes.
If you have some old paneling that needs to be brightened up, follow these tips or call a pro... youll be glad that you did.
Back to top
|
 |
To Spray or Not to Spray?
A paint sprayer is a wonderful thing when used properly. If you have a large painting project looming, and are not afraid to get a bit messy, this might be for you. Anyone can rent a paint sprayer from most local hardware or paint stores and with some instruction, get good results. Here are a few pointers for the serious do-it-yourselfer.
To start with, a sprayer can be very dangerous, in fact deadly if used improperly. When the spray comes out of the tip, it is usually under high pressure which will cut like a razor or produce a very nasty injection wound. When the paint or stain is injected into your bloodstream, it can be deadly if it reaches a critical organ like the heart, brain, etc.
Never set up or clean out the machine with a spray tip on the gun. First, remove the tip housing and lower the pressure to a minimum. Second, if your paint hose develops a leak, no matter how small, do not touch the hose or try to stop the pinhole leak with your hands. Go to the machine and open the bleeder valve to release pressure from the system, and then shut it down. If you try to stop this tiny stream of paint it will surely puncture your skin and cause the injection wound I just mentioned.
Once, on a job where I was spraying, a pinhole developed in the hose and while I did tell the helper not to touch anything, he did. He thought that he would be able to stop the stream with his thumb bad move. The thin stream of oil based paint injected his skin and went clear through his thumb, streaming out through the other side! We rushed him to the hospital and he laid there for over two weeks with his thumb laid wide open like a hot dog cut in half lengthwise. The nurses came in twice a day to literally scrub the raw meat so as to stop the flow of chemicals to his vital organs. Do I need to say more? Spend a little time with the rental person and make sure you know how to properly operate the sprayer before you take it home.
For the most part, there isnt much that you cant use a sprayer for. The main idea is to reduce the labor time for any given project. Sometimes it can be quicker to use conventional brush and roll methods rather than take the time needed to properly mask areas not to be painted. Youll have to survey the situation and make that determination. If spraying, you will need to gather a few items before beginning. You will need to cover anything that you dont want painted or over sprayed. Wear clothing that you can get paint on, and perhaps a spray hood from the paint store to cover your head. You will also want to purchase a respirator so that you dont breathe in any paint. Get some good drop cloths, rags, staples and staple gun, two inch tape, and perhaps some plastic to start.
Wrapping, as it is frequently called, in and of itself is quite a task on larger projects and is a bit of an art form for professional painters. You may need other more specialized sundries as well, but these will get you going. If you run into an unusual situation where these arent sufficient, go to your local paint store and explain your dilemma, they can help. When wrapping any item, keep in mind that the sprayed paint is under pressure, so keep you coverings tight so that the paint spray doesnt loosen your covering job. Staple plastic and drop cloths to wooden surfaces when possible, and then tape over the stapled edge to create a straight line. If you cant use staples at all, consider pre-taped plastic on a roll. This is available at the paint store and is handy for windows, cabinets, tubs and the like. In any event, make sure that your wrapping is not loose as the spray will cause it to flop wildly and eventually come off.
It is also helpful to note that when using tapes, there are a wide variety of sizes and styles. The white tapes are cheapest and have the strongest adhesives. When taping outside or in direct sunlight, you may consider using a blue or green tape. While these tapes can cost up to seven dollars per roll, they are designed to come off easily for up to a week in direct sunlight, which can be a huge problem if ignored. The sun seems to bake the adhesive onto the surface it protects, making removal very aggravating and slow. Once you have all of the necessary areas covered, its time to set up the machine and begin painting!
There are a couple things to remember before you begin. First, always use the lowest pressure possible to accomplish your task. Once the machine is set up and primed, begin in an inconspicuous spot, with very low pressure and raise the pressure slowly until the spray pattern is full and even, without lines. You should keep your spray gun about twelve to fourteen inches away from the surface and move with it so that distance and a 90 degree angle to the surface are maintained. You will need to overlap your spray pattern depending on the surface and its texture.
On exterior wood, you should always backbrush the paint into the wood for the first coat, which means that the spray pattern is not very important. You should apply plenty of paint, even to the point of it running. But on subsequent coats that wont be back brushed or rolled, your spray pattern and the amount of paint applied will be crucial. All I can say is to practice, and be prepared for mistakes.
If spraying inside, it is always a good idea to backroll the final coat of paint so that you can touch up the paint over time with the same size roller nap. Use a roller on a pole with a 3/8 inch nap for smooth walls or a 3/4 inch nap for textures. Roll from floor to ceiling in long strokes. If you dont do this, the sprayed finish will be shinier than any subsequent attempts to touch up with a roller, since the roller nap will leave a slight texture. Back rolling is best accomplished with the help of another, so that you can continue to spray and backroll simultaneously. Again, each job is different, so you may want to ask your paint supplier for more detailed instructions to fit your specific needs.
Whether or not you will be attempting this yourself, let me dispel the myth that I frequently hear in dealings with my clients. The truth is, it is ok to use a sprayer to apply paint to cedar shakes and other wooden surfaces. In fact, if a painter tells you otherwise, he probably doesnt have any experience with using a sprayer. You might be surprised how many contractors dont have that experience. The problem occurs when the sprayer is used improperly. As I mentioned earlier, when painting wooden surfaces or any other porous surface for that matter, the first or prime coat must be worked into the tiny cracks and crevices with a brush or roller. When back brushing is omitted, the paint will not penetrate as it should. As the underlying surface expands and contracts with the seasons and moisture, the paint will begin to lose adhesion, causing peeling of the paint.
If this all seems a bit much for you to handle, dont worry, you are not alone. As I mentioned before, not even all painters can spray properly. If you do think that you might try this, just remember to take notes while getting your info on how to set up and use the machine. If you make a mistake, you can always paint over it, or clean up the mess. Spraying is absolutely high on the difficulty scale for do-it-yourself projects, so consider all of the suggestions above before starting, to determine if this is really for you to attempt, or if you would be better off hiring a professional.
Back to top
|
 |
Curb Appeal (and How Not to Get Burned)!
I love this time of year here on the Outer Banks. It seems like just when you cant stand another day of cold windy weather, springtime peeks out and saves the day. With all of the springtime renewal, most homeowners often begin the process of clean up from winters wrath.
Whether your property is for rent, sale, or just for you, curb appeal can make all the difference in the world. How so, you ask? Well let me assure you that with so many rental homes or homes for sale these days, the markets are getting very competitive. The curb appeal of your home can either make or break you in terms of how many rentals you book or how soon your home will sell. If you are skeptical, just ask any rental or sales agent.
Having realized how important curb appeal really is, you might ask yourself, how can I get the most bang for my buck? The answer is simple. Paint!
Surfaces inside and outside of your home are often covered with a coating that is applied by a painter, and if these surfaces are coated sloppily, your scrutiny then turns to the imperfections beneath the coating as well. There is an old saying in the construction trades which goes, a little caulk, a little paint, makes the carpenter what he aint.
Years ago, when we used to do more new construction, one thing I remember most vividly is this very premise. If we were given enough time to do a really nice, neat job, the rest of the punch list for the other trades was relatively small. Everything shined like a new penny, crisply coated, and clean. But when we were rushed, forced to work over other trades with their dirt and dust resting on our freshly painted surfaces, not being able to clean up completely, the customers always recognized the imperfections in the paint and then turned their attention to the drywall, then the carpentry, then the flooring, and so on and so on. These punch lists were frequently out of control, with items that normally would be perfected by the painter to some degree.
Considering this, its easy to understand why painting is the most frequently requested type of work in a massive home improvement market. Relatively, the cost of painting as compared to other types of work is low. if you hire the right people. Not to mention, anybody can paint, right? Well true, to some degree, but surprisingly few people actually do paint correctly. If you dont believe me, just ride down the road and look at how many houses are peeling. You might be equally surprised to know how many of those homes were professionally paint just a year or two ago. The repair of these peeling homes has actually emerged as one of our specialties, unfortunately for the owners. Just think about how aggravated you would be to hire someone to coat your home for what you think is a good price, only to have that job peel within a year. You are left to track down the painter and hope that they will fix it. I can assure you, that for one reason or another, most of the time they will not. So beware of bargain specialists, since your savings wont mean much if you receive a low quality product without after-sale service.
At this point your actual cost doubles, at least. You see, what usually happens goes something like this. You call four painters for an estimate on a given project. Only two ever respond, and the scope of work that those two painters outline, is vastly different. One says that they will powerwash and then begin to apply one coat of a paint to the siding, for $500.00. The other painter says they will powerwash, and after the house dries out, they will handscrape to remove any additional loose or peeling paint, and then they will prime and apply two coats of stain to the siding for $850.00. Most people will then call one or both painters to ask about the difference in the scope of work, to which each painter defends their scope. For whatever reason, it seems that very frequently, the customer will choose the lowest price, and take the word of the painter that tells them that the additional scraping and coats recommended by the other guy is just a needless expense, when in fact, it is the most important part of the job. So, now that the bargain job has failed, and the painter cannot be found or refuses to repair it, you are left to repair the job, usually at a higher price, since the additional prep work is compounded by another coat of paint!
So how do you wade through the rising tide of painting contractors here on the Outer Banks to select the one thats right for you? Well a good place to start is with their associations and references. If you are satisfied with a contractors recommendations, ask to see their references. A reputable contractor should have references in your neighborhood, and if not, you might ask yourself if the contractor is experienced enough to handle your job. Ask if they are members of the local Chamber of Commerce, and Better Business Bureau. You might think that memberships with these associates is meaningless and just another expense adding to the contractors hourly rate, but actually these associates do provide you the customer with some added assurances, if there are problems. The Better Business Bureau can provide you with free, third party dispute resolution, but more importantly, their standards for membership effectively begin the vetting process for you. Membership in the PDCA (Painting and Decorating Contractors of America) is another tell-tale sign that the contractor is serious about their business and their commitment to their customers. You see, if a business owner does not see value in being members of their trade association, or the qualifying associates of their community like the BBB, how valuable are you to them once the job is finished, or problems arise?
To me, this is where the men are separated from the boys, so to speak. Face it, no company operates without the occasional problem. A companys success or eventual demise rests in some part on how the problems are handled. Companies that are not interested in growth, planning, and associations, very often cannot financially withstand the hit of a warranty project, and will do everything in their power not to paint for free. This mentality is the main reason that the home improvement sector is the most frequently complained about sector in this economy. This mindset costs consumers billions of dollars per year in improper installations and failures within the trades. Many trades are regulated by the state, but painting is not one of them. Compounded with the ease and relative low cost of start up, painting contractors are springing up like so many new blades of grass here, on the Outer Banks. While it is true that painting is not rocket science, and anyone can paint, or at least move their arms back and forth with a brush in hand, professional painters never really stop learning. With coatings, tools and regulations continually changing, serious contractors strive to learn all they can to improve their finished products and service to their customers. In a market where there is a never ending stream of painters promising to do the same job at a lower price, value is sometimes hard to discern, but if you take the time to look into a companys backround and reputation, and remember that price is relative to the quality of the proposed work, you should not be disappointed. If problems arise, you can rest assured that the companys main concern is your satisfaction, and not whether they can afford to repair your job.
When gathering your estimates, there are several specific things you should be looking for. First, you must compare apples to apples as it were. If you get differing scopes of work, you must determine which scope is proper for your job. You might try talking to all bidders, but if you are still not sure, contact the PDCA or your local paint store. Believe me, the paint stores dont want their paint failing any more than you do, and will usually be able to tell you what is proper regarding preparation and coatings, keeping in mind that they do sell paint. I have been in situations where the paint store tries to sell the customer an extra coat of primer or a much more expensive coating, etc.
Second, make sure that the contractor will be using a moisture meter for exterior work to check the moisture content of the substrate prior to painting. Moisture is the primary cause of paint failure, and if the contractor does not use a meter, they are guessing. Wood cannot be painted properly until the moisture content is below 12%... period. As far as I know, there very few contractors using the meters here, so beware, and be sure.
Third, make sure that the contractor does not specify cheap materials. Materials usually are less than one fourth the cost of any given project, with labor being the most expensive. What have you really saved if the cheap materials only last a couple of years? This is also true with caulking. Caulk is the sole barrier between your trim and siding, which when failed, often goes unnoticed and causes rot and mold. These repairs are usually extensive, and expensive and could be prevented by using a five dollar per tube caulking instead of a two dollar per tube caulk. Again, illustrating where the real value is.
Fourth, realize that there are too many other pertinent things to think about than can be covered in this article, and you are ultimately responsible for your decisions. In painting, value comes in the form of long lasting jobs, and crisp clean work. While every company reports to deliver this value, statistics show that this market is sorely lacking in professionalism. Do your homework, develop relationships with reputable companies, and youll sleep better knowing that your property has that curb appeal which sets you apart from the rest!
Back to top
|
 |
Color
Over the last year, I am amazed at how often we have come across customers that just cannot seem to choose a color for their project. At first, it just seemed ridiculous, but over time, I have come to realize that color selection is sometimes not as easy as it may seem. After all, there is often much at stake. How happy would you be if in the end, youre not happy with the chosen color? Here are a few tips that may help you in this regard.
A color is not necessarily good or bad, rather it is only paired correctly or incorrectly with other colors. It is really all about relationship, and how well one color relates to others in the same space. Colors evoke emotion and thus it is not only what you see, but what you feel. Color can set a mood, frame an object, or act as a back drop for your furnishings. It is the palette on which everything else is showcased. Since color can be used in so many ways, you should think about how you intend to use it before you begin. And color is also the most simple renovation that can transform a space, area, room, or home!
Colors do evoke feelings and are used for that expresses purpose by marketing firms, hotels, casinos, hospitals and even prisons. Most colors fall into one of two categories, those being warm or cool, and they can be used in different settings to set a desired mood or tone for any given space.
Reds, oranges and yellows are often referred to as being warm colors. The feelings they usually produce make us feel warm in some sense. For example red is a color that has actually been proven to increase blood pressure and heart rate, not to mention stimulating the appetite. It produces feelings of intimacy, passion and sexuality. Red is very often used in restaurants and dining rooms in the home. Orange also evokes warm feelings, but in a more subtle way. It generally makes you feel more friendly than passionate, more welcoming than seductive.
Orange can look and feel wonderful in a living room, family room, or even a childrens bedroom. Yellow can also make you feel warm, and certainly does catch the eye. It can lift your mood and even light your way in some sense. Yellows are often thought of as being more playful and uplifting than welcoming or friendly. They work great in poorly lit hallways or foyers, and is cheery in an elderly persons bedroom. Bright yellows, though, have been shown to cause anxiety in infants, young children and the elderly, so beware.
Blues, greens, and violets are considered cool colors because the feelings they elicit are generally ones of serenity, peace, and relaxation. You might find these colors in a pastoral landscape or ocean vista. Blue can be a wonderfully soothing color choice for a bedroom. While it may lull you to sleep, it has also been shown to suppress the appetite, so you may want to keep it away from the dining room. Green has been shown to have a similar calming effect, possibly since it is the dominant color in nature. It seems to work well anywhere in the home.
Light greens have been all the rage recently, and if you look closely at your favorite home magazine or catalogue, youll see what I mean. Greens also work well in hospitals, schools, and work environments. Violets generally do not elicit a favorable response in adults, but most children do have an affinity for the color.
My personal favorite, violet was once known as the color of Kings since the ancient colorants used to produce it could only be afforded by royalty. In the proper shade, violet can still produce a rich, calm feel. Otherwise kids rooms and play areas might be a good place to experiment with this family of color.
Now that you have the basic psychology of color in mind, go and pick some colors. The first thing you might notice when doing so, is the miniscule two inch by two inch sample or chip that most stores provide. It is very difficult to envision how a particular color might look in a given space from one of these chips. You may want to purchase a small amount of paint in that particular color and apply a sample to the space before buying all of the material at once. Very often, you may find that you need to tweak the color slightly to fit your needs and likes. Also, different lighting produces different effects with any given color, so make sure that you have plenty of natural light when matching that sofa or drapery. Incandescent light is not sufficient to perform an accurate color match or even to select a complimentary color. Frequently a color will not be chosen to match a piece of furniture or window treatment, but a complimentary color is chosen to highlight an item or make a suitable backdrop for your belongings.
If you are still at a loss, you might consider hiring a decorator. While they can be pricey, it might be just the thing for you. Painting contractors also provide this service, sometimes free of charge! Paint stores recently have produced giveaway computer programs wherein you take a digital picture of the space and enter it into the program. Once this is done, you can use their color palette to try different colors! Check with your Benjamin Moore or Sherwin Williams dealer for these goodies.
In any event, you dont need to be afraid of using color on or in your home. In fact, you may be surprised how well youll like it. Give it a try, set a mood, excite an appetite, or calm the frantic, all with color.
Back to top
|
 |
The Truth About Lifetime Coatings
With any investment, there is maintenance, and with the purchase of a rental property or second home, painting is a significant portion of the overall maintenance cost. With the flooding of the rental market it is becoming increasingly important to maintain the appearance of the home to continue to attract the renters needed to float your investment. With the increase of the available rental properties, renters are becoming much more discriminating with their dollars.
These days, lifetime coatings are all the rage. Five years ago, this was not the case at all and if you asked any paint store what they thought about a lifetime coating, they would scoff and tell you there is no such thing. It is ironic that now all major paint manufacturers are producing similar lifetime coatings. Generally speaking, most of these products are very similar in their components. The main factor in their longevity is the high solid content of the material as compared to regular paint. You see, most paints off the shelf only contain between 25% and 35% solids and the rest of the material simply evaporates as the product dries. Sherwin Williams Duration (which does not carry a labor warranty) contains 40% solids, and Liquid Ceramic coating (which does cover labor and materials) contains 61% solids. Theses coating last longer simply because there is more product left on the house to well. last! Buyer beware, there are also many other hidden truths which I hope to reveal to you for your own enlightenment about this growing market.
First, we should be clear that not all lifetime coatings carry a labor warranty. It is true that all advertise guaranteed product replacement, but in reality, it is very unlikely that the product will fail due to a faulty product. As I always say, 99% of all paint failure is due to improper application in one form or another, and this is not considered a coating failure. Remember that usually, labor is the largest portion of most jobs and youll be paying for that all over again in most situations.
Second, there is a growing list of coatings systems that do advertise a lifetime warranty which covers labor and materials. While this sounds like the end all to your painting situation, remember that the coating is only as good as the company applying it. Most people do not know that most of the time, these jobs are subcontracted to painters who are not employees of the lifetime coating company that you contracted with. The company who sold you on their product and professionalism, very often is not the company who does the work. I have noticed that frequently the owners of the Lifetime Coating Company have merely purchased a packaged marketing strategy and the rights to sell the coating in a protected territory, and have never painted in their lifetime, professionally or otherwise. They were architects, engineers, or other professional people trying to make a better living as a business owner. The co-op marketing and hard sell sales approaches are very effective, and very often misleading.
The subcontracted painter may not be covered by workers compensation insurance or liability insurance. The painter applying your coating may be brand new in business, or may have been in business for years, unsuccessfully. The bottom line is that problems occur when corners are cut in the preparation or the prep is just done improperly. If you have been reading this article for any length of time, you will know that while anyone can paint (or at least move their arms, holding and paint brush), not everyone can paint properly. Painters must own a moisture meter, a surface temperature thermometer, and possess knowledge of substrates and products that used to be taught in an apprenticeship program which took years to master. This is no longer the case and frankly while you may be paying $3-$5 per square foot for your lifetime coating, the job often gets subcontracted out for .85 per square foot. This issue alone has become a two thousand pound gorilla on the back of this emerging market and it all falls back to the stability and ethical standards of the company that you contract with. If youre a bit skeptical, do yourself a favor and visit http://www.spraysiding.com and see an entire website dedicated to complaints regarding application and failure to honor the warranty. This is not the only site of this nature, revealing the scope of the problems in this market. Oh, and by the way, just because a coatings company advertises that they use certified applicators doesnt mean that they use certified applicators.
So, where do you go from here? Use your common sense and time tested methods of vetting a company before you buy the product. Contact the Better Business Bureau to check for complaints. Use the internet to check for complaint sites. Call the Chamber of Commerce, and above all ask the company for references. Make sure that no subcontractors will be used during the coatings process and get it in writing! Your home should be measured, and then the companys production rates and the material spread rate applied to those figures to produce a cost for the job. You should get a written estimate with one price, not several prices depending on when you sign the contract. Be especially wary of unit pricing for these coatings jobs since the preparation is always different from one home to the next.
You could benefit greatly from these newer products, certainly over time. The cost savings over twenty years could be in the tens of thousands of dollars, but only if you do your homework first!
Back to top
|
|
Never Paint Again?
With the coming of spring, I find myself thinking about the great outdoors and all that it has to offer. Sun, fun, and painting? Wait a minute, painting doesnt belong in that sentence, but most of us will have some painting to do to get ready for the coming season. If this is you, you might be excited to learn about a product that has benefited from the space program and ended the need to worry about painting next year, or ever again for that matter. Liquid Ceramic Coatings now offers product that has been tried a | | |